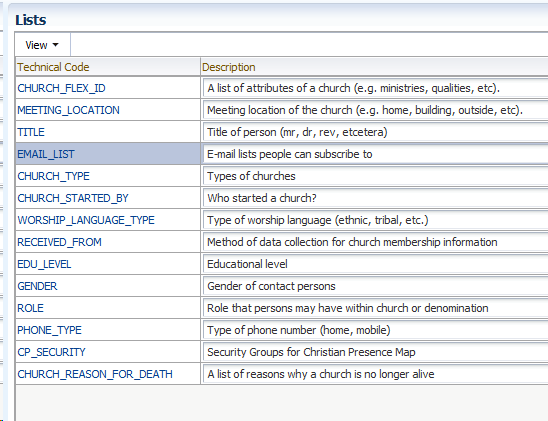
Harvest has several "dropdown lists" throughout the system to have a fixed set of values for a particular field. For example, the educational level of persons is such a list.
As a national coordinator, Harvest allows you to modify and translate the values of these lists to make them suitable for your country.
Note: not all lists may even be used in your country. Some countries, for example, do not use the 'reason for death of a church' list. Feel free to leave that list empty.
Note: Worship Languages form a separate list under System Setup - Worship Languages.
Step 1: Identify which list you want to change. For example: do you want to change the list with gender, or educational level, or church type?
Step 2: Navigate to System Setup - Lists.

Step 3: Now look for the list that you want to change in the table. The descriptions should give you a good hint.

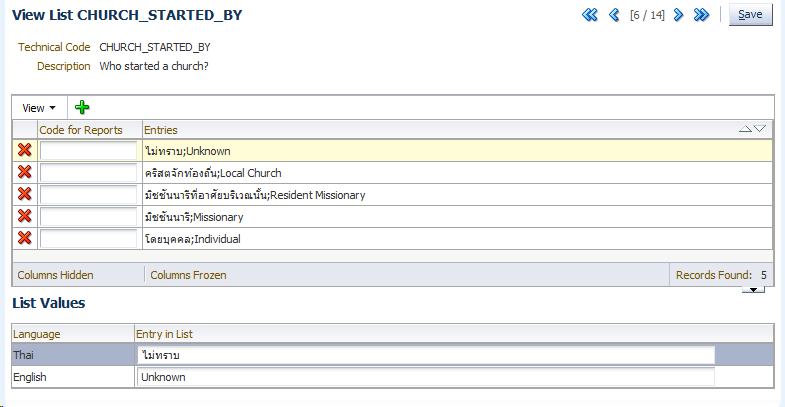
Step 4: Click on the 'Technical Code' of that list to open the list in a new screen.

Step 5 (optional): You can now Add new items by clicking on the + icon. After you have clicked on the + icon, a new row will appear in the table, and the bottom table (List Values) will have '---' as an Entry value for all languages. Provide translations for the new list item you want to add.
Step 6 (optional): You can also delete entries from the list by clicking the X icon next to that entry. However, BE CAREFUL: you should only delete entries that are not already used in the system. In the example above you should not delete the entry 'Missionary' if there are churches that have been started by a missionary. You should first move all churches that have that item selected to another (more appropriate) entry. Contact GlobalRize to do that automatically if needed.
Step 7: Click Save to save your changes.
First repeat steps 1-4 above.
Step 5: click on the entry you want to translate. You will see all existing language entries in the table.
Step 6: At the bottom table (List Values) click the 'Entry in List' for the language you want to translate into. Supply the correct translation. Repeat step 5 & 6 for the other entries.
Step 7: Save your changes.